
If you’re like me, you most certainly already have a massive media library on your server. You’ve gone ahead and installed NextCloud for the sake of organization and occasional sharing of media with friends and family. This process could be not only daunting, but it could also consume a large amount of space and/or kill some of your already seeded/currently seeding files. I chose to move them over immediately and also keep them active within ruTorrent and/or Deluge.
If this sounds like your cup of tea, here’s a quick walk through that is simple and only takes a few minutes of your time.
###First change permissions within your media directories.
This is to ensure that permissions are squared away as they should be. Without proper permissions in place, the softlink between your /home/username/Media Directory may fail and show your linked directories to contain 0 bytes worth of data.
username=Enter Username Here
mediadir=/home/$username/Enter Media Directory Here
find $mediadir -type f -exec chmod --changes 644 {} + -o -type d -exec chmod --changes 755 {} +
You may additionally use the simplified built in alias we provide: fixhome
Please be advised that if you are running the long version of the above commands as root and not as the user, you must change
$usernameto the users actual username. With the alias you will need to type:su usernameto switch to that user, followed byfixhome
###Next, run your softlink copy command.
I prefer softlinking as it saves space on your system by essentially creating shortcuts to the actual files in their locations. Additionally, softlinks are great to utilize as removing the parent item will additionally reflect on the child… or the softlinked locations item within your NextCloud.
username=Enter Username Here
mediadir=/home/$username/Enter Media Directory Here
sudo cp -sR $mediadir/ /home/$username/.nextcloud/$username/files
Notice above my NextCloud data location may be different from yours. I choose to keep my trees well maintained by placing the NextCloud data folder on install within a hidden directory in my users home directory. This makes access easy and crystal clear, it additionally adds a bonus layer of security to the data itself since it is stored within a protected user directory. If you opt for this method on install, be sure to create the directory first and then give it www-data permissions in order for NextCloud to have proper access to it’s contents.
###Now you will need to change the ownership.
Change the ownership of your newly linked directory within your NextCloud data folder. This can be achieved by doing the following:
username=<Enter Username Here>
og=www-data
nc=/home/$username/.nextcloud/$username/files
sudo chown -R $og $nc
Again, I have simplified this by adding conditions and reducing your need to type; however, you will need to change the data directory accordingly if yours is in a different location.
Finally, within your NextCloud instance create a directory. I chose to name it TV for the purpose of this demo.
In some cases you will see that the size of your directories and files are showing as “Pending”. This can be rectified by simply running a manual scan of your data folder. To do this you will first need to navigate to the where NextCloud is installed. QuickBox has it installed via /srv/nextcloud. Now run the following command and wait for it to complete:
sudo -u www-data php occ files:scan --all

Once completed it will appear as the following:
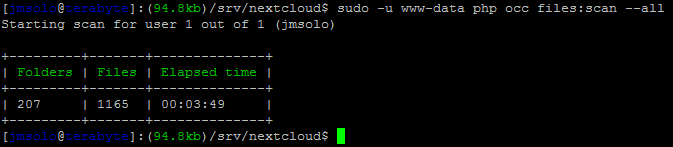
###There you have it! 
Now all of your added media is included within your NextCloud install and your data directory sizes are displayed properly. You can create share links with other users and/or friends and family the world around.
Enjoy!